FC-AL cables, optical, connecting after FCIC replacement
This topic describes how to connect the FC-AL cables.
Before you begin
About this task
Important: The optical cable plugs (LC connectors) and ports (SFPs) must be
cleaned before connecting them. Use cleaning tool 54Y4392 or IBM-approved alternative. After
cleaning SFPs with the tool, use air bulb 45D2645 or IBM-approved alternative. For detailed
procedures, refer to current DS8000 Info Alerts or contact your next level of support.
Procedure
- Connect the FC-AL cables to the FCIC. Use the
location code labels on each cable to ensure it is properly connected.
- If your FC-AL cables have location labels which include the physical location code (example: R1-G01-P1-C6-T2), refer to Figure 1 and connect the cables. After connecting the cables, go to step 3.
- If your FC-AL cables have location labels with only the three-character connection designators (example: 4A1), go to step 2.
Figure 1. FC-AL location codes for the fibre channel interface card (FCIC), optical FC-AL ports 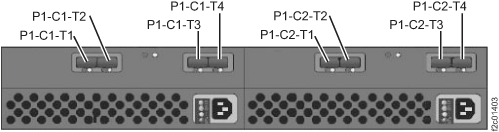
-
Determine whether Rack-1 FC-AL cabling is "standard" or "business
class."
- Find the rack internal model label to the left of the
upper PPS (Model 951) or DC-UPS (Model 961).
The label will be on the left sidewall of the rack, and it is shown
in Figure 2.
Note: DO NOT use the rack model that appears on the outside of the front cover.
Figure 2. Rack-1 configuration labels (examples) 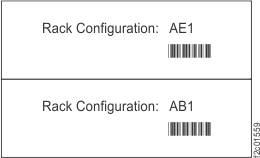
Figure 3. Point-to-point cabling diagram for the FC-AL cables (Models 951, 95E - Rack-1 Configuration: AE1; Models 961, 96E) (rear view, racks 1-2) 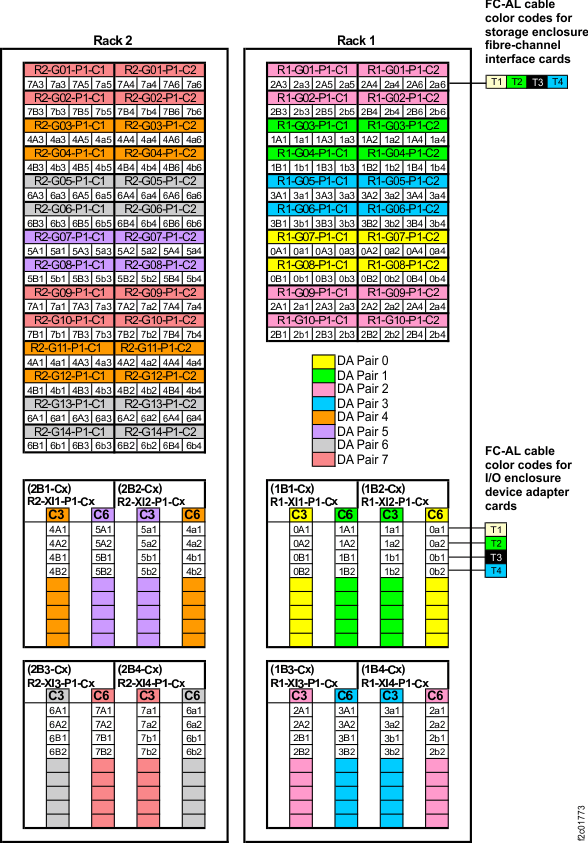
Figure 4. Point-to-point cabling diagram for the FC-AL cables (Models 951, 95E, 961, 96E ) (rear view, racks 3-4) 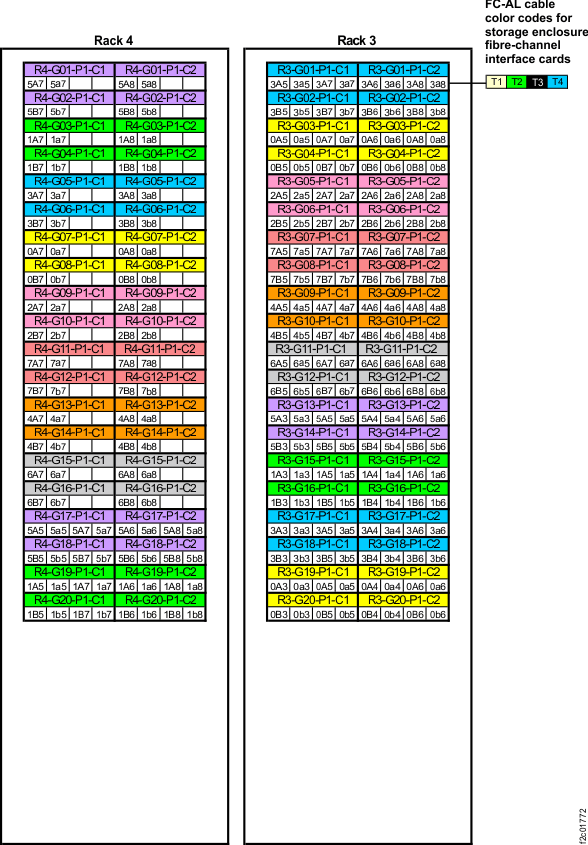
Figure 5. Device adapter pair IDs for storage enclosures (Model 951 with business class cabling) (rear view) 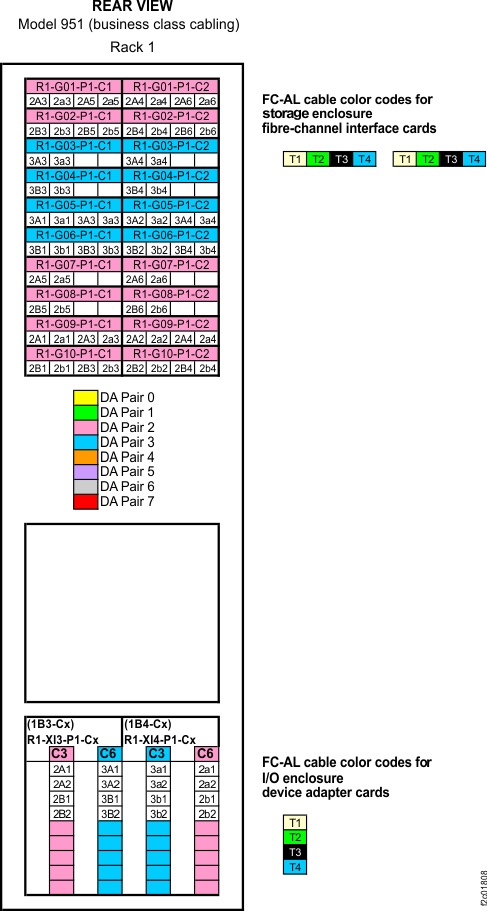
Figure 6. Point-to-point cabling diagram for the FC-AL cables (Models 961, 96E) (business class) (rear view, racks 1 and 2) 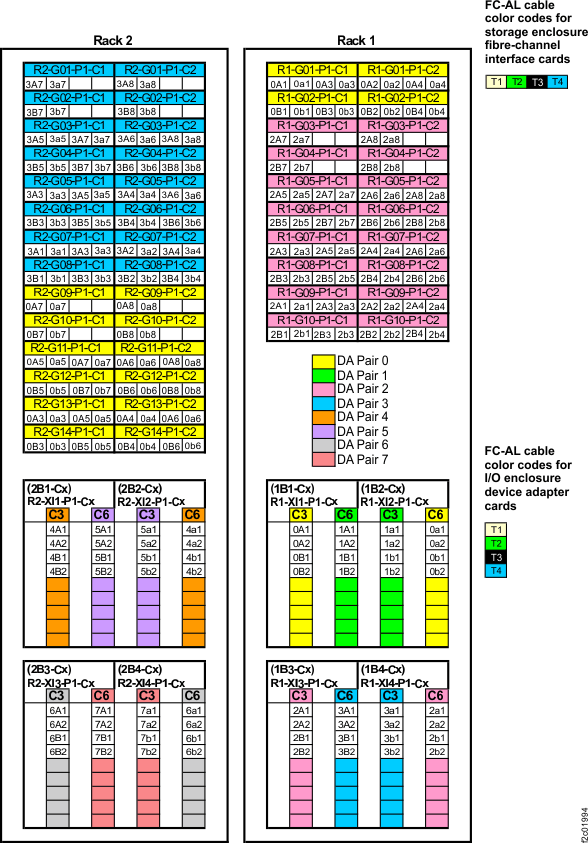
Figure 7. Point-to-point cabling diagram for the FC-AL cables (Models 961, 96E) (business class) (rear view, racks 3 and 4) 
- Find the rack internal model label to the left of the
upper PPS (Model 951) or DC-UPS (Model 961).
The label will be on the left sidewall of the rack, and it is shown
in Figure 2.