Exchange the PPS sequencer module
Before you begin
 Use approved ESD procedures to prevent damage.
Notes:
- All the cables and FRUs to be removed must be uniquely identified so they can be reinstalled correctly.
- If an installed earthquake resistance kit prevents you from accessing this FRU, refer to MAP1600.
DANGER
Hazardous
voltage, current, or energy levels are present inside of a component
to which this label is attached. (L001) 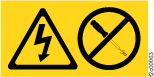
Remove the primary power supply (PPS) sequencer module
About this task
Note: It is normal for various PPS LED indicators to stay lit until the
mainline input CB is switched off and the J3 PPS-to-PPS communication cable is disconnected. The
communication cable supplies signals and logic voltages so the PPS control circuitry can stay active
in the event of loss of input power to one PPS.
Procedure
- Do not use the PPS FAULT
LED indicator
 to identify the PPS being
repaired.
to identify the PPS being
repaired.
- When the failing PPS is being repaired, the PPS FAULT LED indicator on the working PPS in
the same rack might be on solid.
The working PPS is indicating that the PPS being repaired is not available for use. - Use the FRU Identify LED indicator
 to identify the PPS being
repaired.
to identify the PPS being
repaired.
Figure 1. LEDs on the PPS (front) 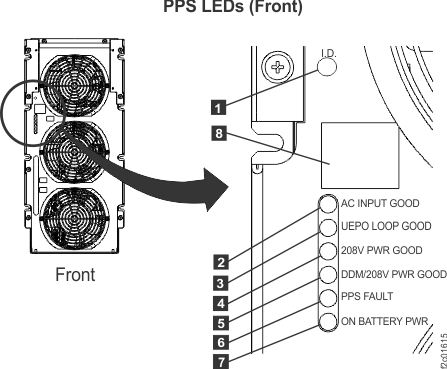
- When the failing PPS is being repaired, the PPS FAULT LED indicator on the working PPS in
the same rack might be on solid.
- To gain full access to the rear of the PPS, unfasten and then rotate the power distribution
units (PDUs) away from the rear of the PPS.
Figure 2. Power distribution units in normal position (rack rear view) 
- Remove power and mainline power cord from the PPS.
- Set the PPS ac input
power module CB00 switch to Off (down) .
- Disconnect the mainline power cord from the PPS ac input
power module. Push the two release levers
 .
. Figure 3. Removing the ac mainline power cord 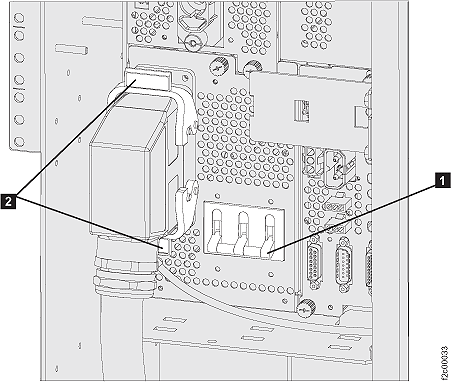
-
If repairing PPS-2 (the lower PPS), remove the cable ties
securing the mainline power cable to PPS-2 (lower PPS). Remove the screw securing the
mainline power cable bracket, and then remove the mainline power cable bracket . See Figure 4.
Figure 4. Power supply main line 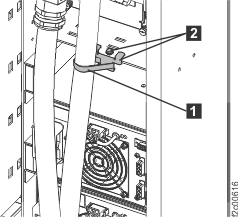
- Set the PPS ac input
power module CB00 switch to Off (down)
-
At the rear of the PPS REMAINING IN USE by the customer, disconnect the
 PPS-to-PPS communication cable at the bottom right of the PPS sequencer module (see Figure 5).
Notes:
PPS-to-PPS communication cable at the bottom right of the PPS sequencer module (see Figure 5).
Notes:- Disconnecting the cable from the working PPS will protect the working PPS. Then, when the other end of the cable is disconnected from the PPS being repaired, no pins inside that connector will be able to touch ground and shut down the working PPS that remains in use.
- This removes the remaining logic power from the PPS being repaired, and all PPS LEDs should now be off.
Figure 5. PPS rear view, lower right: PPS-to-PPS communication cable connection 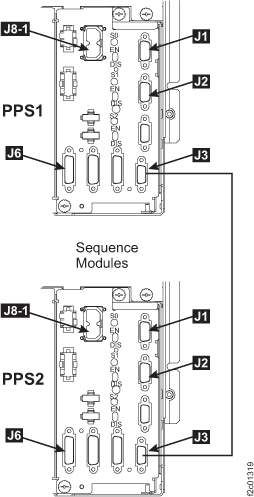
-
At the rear of the PPS BEING REPAIRED, disconnect the PPS-to-PPS communication cable
at the bottom right of the PPS sequencer module.
- If replacing the PPS-1 (upper PPS), at the front
of the rack (see Figure 6):
- Remove the two screws .
- Remove the door latch bracket .
Figure 6. Rack front door-latch bracket 
- Remove the two screws
- Slide the PPS out to
the service position.
- At the front of the rack, remove the eight hex head
screws that fasten the PPS chassis
to the rack . See Figure 7.
Figure 7. Primary power supply (PPS) retaining screws 
- Slide the PPS out just
far enough to allow you to remove the PPS sequencer module. Figure 8 shows
the PPS fully forward.
Figure 8. Move PPS to service position 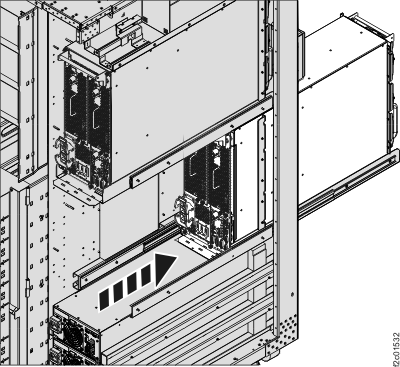
- At the front of the rack, remove the eight hex head
screws that fasten the PPS chassis
to the rack
- Remove the PPS sequencer
module.
- The next steps may require you to remove one or more
cable routing brackets from the rear of the frame so that there is
clearance to remove the PPS sequencer
module.
Each bracket is held by two screws that only need to be loosened, not removed, for the bracket to be moved. See Figure 9,
.Figure 9. Cable routing brackets 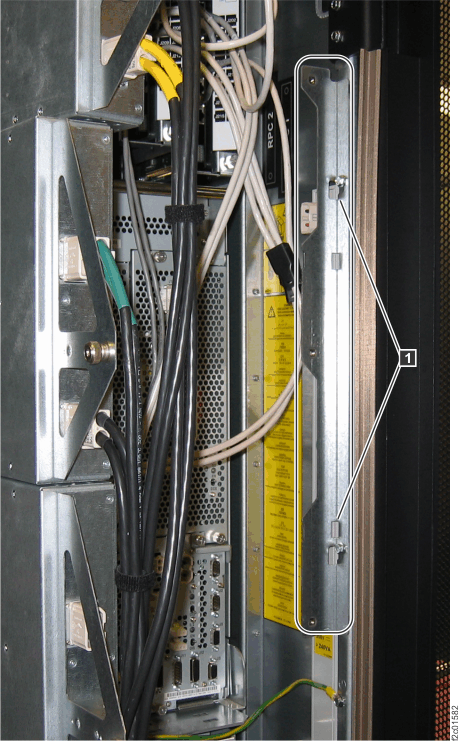
- At the rear of the rack, remove the sequencer
module . Move the release lever down and then
slide the module out. See Figure 11.
Note: If the sequencer module slides out about 1 inch (2.5 cm) and then stops, it is hitting the PPS tray tab beneath it. The PPS assembly will need to be moved slightly to the right. At the bottom left of the PPS, insert a screw driver between the PPS tray vertical sheetmetal and the PPS. See Figure 10,. Apply gentle pressure to move the
PPS assembly to the right until the sequencer module releases.
Figure 10. Gently pry PPS assembly to right 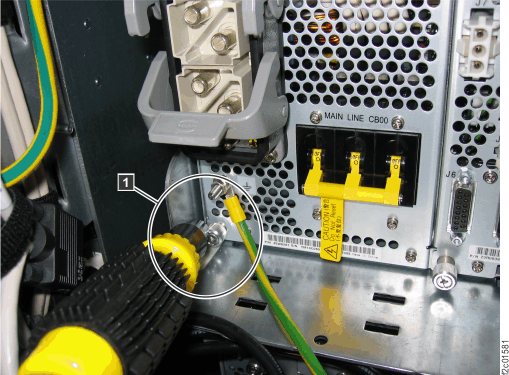
Figure 11. Remove sequencer module 
- The next steps may require you to remove one or more
cable routing brackets from the rear of the frame so that there is
clearance to remove the PPS sequencer
module.
Install the primary power supply (PPS) sequencer module
Procedure
- Install the PPS sequencer
module. See Figure 12.
- Ensure the ac input power module CB00 switch is off (down).
- Start with the sequencer module release lever in the down position as you slide the module into the PPS.
- Move the release lever up to fully seat the module.
Figure 12. Install sequencer module 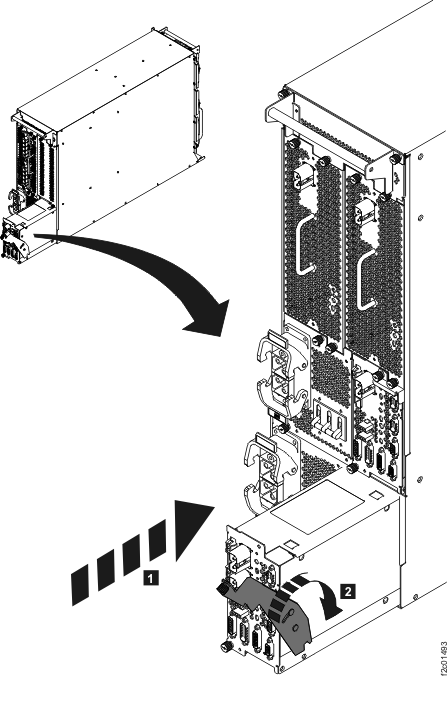
- If the PPS was moved
out to the service position, move it back in to the operating position.
- Install the eight hex head screws that fasten the PPS chassis
to the rack . See Figure 7.
- If you are repairing PPS-2 (lower PPS) FRUs
at the rear of the rack, install the mainline power cord PPS-2 bracket
(if present).
Figure 13. Move PPS to operating position 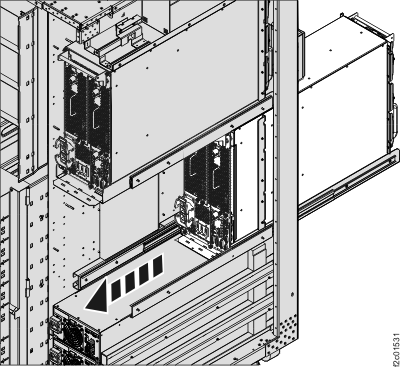
- Install the eight hex head screws that fasten the PPS chassis
to the rack
-
At the rear of the PPS, connect the
 and
and  cables to the sequence
module.
cables to the sequence
module.
Figure 14. PPS rear view, lower right: PPS-to-PPS communication cable connection - Connect the remaining rear cables except for the following:
- The PPS-to-PPS communication cable (see Figure 14.). It is connected in a later step.
- The mainline power cord. It is connected in a later step.
- The 208V power cables (see Figure 15) that were disconnected are connected in a separate procedure after the PPS has powered on and been tested.
Figure 15. PPS 208V DC cables 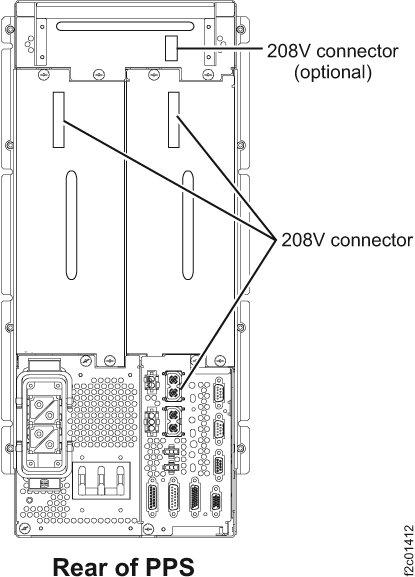
- The
-
At the rear of the PPS BEING REPAIRED, connect the PPS-to-PPS communication cable
at the bottom right of the PPS sequencer module.
-
At the rear of the PPS REMAINING IN USE by the customer, connect the PPS-to-PPS communication cable
at the bottom right of the PPS sequencer module.
Note: One or more of the PPS LEDs may now be lit on the PPS being repaired.